User Report
This report will enable you to gain non-training data on both 'active' and 'inactive' users on the system.
If you are a Client Manager on the system, you will be able to run reports on the students that you have access to only.
If you are a Client Administrator, you can run a report on all users on the system. This will include all Client Managers and Students, and other Client Administrators.

Primary Filters
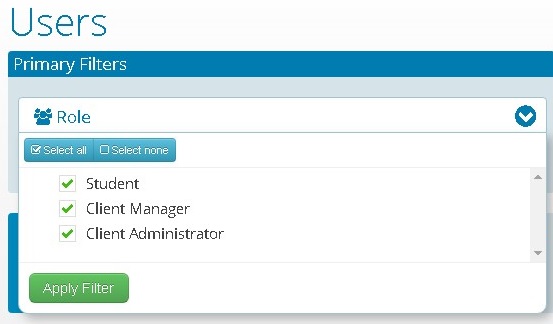
In this report, you can choose the 'Role' of the user you require data on. By default, these will be all ticked.
The 'User Active Status' by default these are both ticked.
Once you have chosen the fields you need, click 'Run Report' for the data to load in the table below.

Secondary Filters
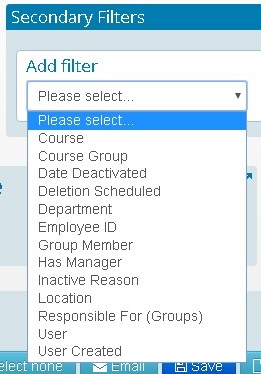
These filters will enable you to break down the data into more specific groups you need. When you select from these, a new option will appear on the screen. You can then choose the required groups/ information from there. Then click 'Apply Filter' for the data to update in the table below.

Action
This allows you to add/remove users to groups, add notes to selected users and change the status from here.
Add more columns?
This allows you to simply populate data in columns, instead of filtering. To do this, click on the 'Add more columns?' drop down to show the column options you can add.
Once you have chosen the column you want to add to the report a 'Get data' button will appear. Click this for the results to show as a new column.

The Dashboard
The dashboard will show a range of information linked to these users and groups you have selected from the Primary and Secondary Filters.
You will see the overall total of users you have in all of the groups you have chosen as a figure. These are expandable in the right hand corner, at the blue arrows.
'Users by Role' will provide you a breakdown in % of who are 'Students' 'Client Managers' and 'Client Administrators' in the report you are running
'Users Assigned By Course' will provide you with a breakdown of how many users are in each course you have on the system. This is not broken down based on the filters you have selected. You can click on the bar in the graph to take you directly to the users that are in those courses. This will load in the results table below.
'Users by Manager' will provide you with a breakdown of the users and their managers on the system. You can also click on this graph to load the information in the table below.

The Results Table
The results will show in here based on the Primary, Secondary and Columns you have selected. You can increase the rows that show in this report by changing the drop down on the 'Items per page' that shows above the 'Forename' column.
All of the columns can be ordered by clicking on the header or column name.

Emailing Users from the report
This can be done by ticking the boxes on the left side of the 'forename'. Once you have selected the users you want to email, you then need to go to the 'email' button. From here, a new screen will load.

You will need to choose the 'Email type' from the drop down list, tick the email template. The Email subject and body will load, here you can edit the content before you press 'send'
Training Notifications and Reminders will automatically contain the login link, but all other email templates you will need to tick the 'append login link' if you require users to access the system based on the email you are sending them from the system.
If you do not want to send the email to the user(s) straight away, you can then select 'Schedule' you can then enter the date for the email to be sent and them click 'Submit'.

Saving the report
Once you have run a report you are happy with - you can then 'Save' the report for future use. When you press the 'save' a new screen will load, you can then give this report a 'name' and 'Description'. When you have saved the report, it will show up in the list of 'Your saved reports' when you go back to the 'System Reports' screen.

Exporting the report
This report can be exported in to Excel/Csv and PDF format from the dashboard panel.
